March 15, 2014

Black & White Double Zig-Zag Card/ Accordian Card/ Cascade Card

Hey there, I'm happy to share my latest creation with you. 

I made this for Mom for Mother's Day... I know, I know... it's nowhere near Mothers's Day. But when I saw this style of card on Pinterest, I had to find an excuse to make one right away!!!

I saw several examples on Pinterest, referred to as either an accordian card or zig-zag card. So many beautiful cards and I was particularly drawn to the ones that incorporated lots of "swirls" and flowers. I used my Cricut (of course!) for all of these shapes.

 I followed the directions from one particular tutorial, which was clear and simple to follow... 


I hope my Mom will love it as much as I do! I spent a lot of time on this card and really enjoyed my paper playtime!!!

Have you tried a zig-zag/accordian style card yet? You can make one that is much more simplified that will still look beautiful if you don't have the several hours to spend on yours, as I did on this one. 

Well, ta-ta-for-now! Blessings and Happy Crafting!!!!!

March 13, 2014

Pretty in Pink Card

Well it's Baby Girl's 20th birthday today!!! How is that POSSIBLE?!?!? I cannot believe I have 2 adult children. It's been an amazing journey and I wouldn't trade the job of Mommy for anything in the world! She is an amazing daughter & I am blessed. We have become good friends now and I love that so much. 

Here's the card I made for her birthday... Simple and sweet and she loved it ;)

Materials: I used the Cricut Cuttlebug 'Happy Birthday' embossing folder, ribbons, patterned paper, brads and a jewel.

Hope you are all enjoying your own paper playtime!
Blessings & Happy Crafting!

March 12, 2014

Oh Baby!!! Adorable Cricut Cards

Hey friends! So happy you decided to drop by! 

My son bought me the Baby Steps Cricut cartridge for my birthday last month and I instantly fell in LOVE with it! I think the images are just too cute for words and I can't wait for an opportunity to give one of these cards to a mommy-to-be & hopefully make them smile.

I think I'll craft another set of these in blues and greens for a baby boy card. Do you think I should make one in yellows for someone expecting a precious package without knowing whether it's an innie or an outie? Probably will... these baby cutouts are too stinkin adorable to stay away for long!

These cards took much longer to assemble than I anticipated but I love them. There are several pieces to cut and assemble and since some of them are really tiny it was a little "fussy" to put together. Totally worth it, don't you think? 

Materials: a bit of ribbon, Cricut 'Baby Steps' cut-outs, Cricut Cuttlebug 'Swiss Dots' embossing folder, Sizzix 'Decorative Dots' embossing folder and the "hello baby" sentiment is from the Stampin Up 'Teenie Tiny Wishes' set.


Materials: a bit of ribbon, Cricut 'Baby Steps' cut-outs, Cricut 'Elegant Edges' frame for the sentiment, all on a Sizzix 'Framed Tulips' embossing folder, some Stickles on the edge of the cloud and in the tiny dots around the sentiment. The "hello baby" sentiment is also from the Stampin Up 'Teenie Tiny Wishes' set.

I'll soon be tinkering around with some Tim Holtz distressing inks I just bought. I'd like to give my creations more dimension but so far I am a bit intimidated by the whole distressing process.

I've got plenty of experience inking the edges with stamp pads but that soft look I see on many cards these days is just beautiful and I'd love to learn to do that. Can any of you wonderful crafters point me in the right direction for instructions and/or tutorials? 

I've been staying inside a lot the past few months Playing with my Papers. The weather has been CRAZY here lately! Yesterday it was in the mid-60's and today we're having a blizzard with over a foot of snow!!! We can go from shorts weather to snowsuit weather in less than 24 hours!!! That's upstate NY for ya! LOL

Have you taken advantage of the long, cold winter to stay in and Play with Paper? :)

Blessings & Happy Crafting!

March 10, 2014

Simply Bright Birthday Card

Hi there, thanks for stopping by!

I made this little cutie the other day and thought I'd share it with you all. It's pretty simple but I really like that. When I have more time, I enjoy going over the top but that's a rare thing these days.

Sometimes simple is better, especially when time is short and you can only squeeze in a few minutes of "me time", rather than foregoing craftiness altogether. I hope you get to grab some of those moments for yourself! It really refreshes me when I do. 

I think this would be perfect as a guy's card since there are no flowers or anything too "pretty".

Materials: I used my Big Shot with the Cricut Cuttlebug 'Happy Birthday' embossing folder, letter stickers (not sure who makes these), some rick-rack, paper and ribbon. I also added tiny drops of Stickles on the rick-rack. Easy peasy!

Glad you could drop by! Leave me a message to say hello. I'd love to meet ya and see what awesome creations you come up with too! :)

Blessings & Happy Crafting!

March 1, 2014

Penny Slider Card- Flowers in the Sun

Hey guys! Glad you could drop by! It's been a while since I've posted due to health issues, but I'm happy to be back in my craft room and back here with all of you wonderful, crafty friends! 

Does anyone else just LOVE to look at ideas on Pinterest? I am a bit of an addict, I'll admit. One of my favorite things to look through are cards... specifically unique and unusual styles of cards. Movement/kinetic and uniquely shaped/cut cards are so interesting and everyone who receives one seems to love the unexpected touch of whimsy. They are all around fun for everyone!

Well, this little sweetie is a penny slider card. The little sun spins around and slides from side to side as you tip the card. I love how it turned out! 

I found several tutorials on Pinterest showing how to make them.
Here's one tutorial that I particularly liked:


 The shapes are all cut with my beloved Cricut, of course! Another wicked addiction...
and one that I will never quit if I can help it!

Thanks for visiting! Drop me a note to say hello, won't you? I'd love to see what creative penny slider cards you come up with too! :)

Blessings & Happy Crafting! 

February 18, 2014

Scripture Mini-Book

Hey there, thanks for dropping by! Since I've been going back through my craft history, I thought I'd share some of my favorite older projects... 

This one was a mini Scripture book for my Mom for her birthday several years ago. She is a devout Christian and loves to read the Word so I thought she would appreciate this. Indeed, she did.


I added a lot of Bible verses mixed with things about her that make her uniquely her, uniquely SPECIAL. She is my best friend so this came to me naturally...


I printed a lot of the verses using MS Word and some from various stamps in my collection...


The entire family... myself, my hubby, my son, my daughter and my Dad, all wrote a special message to her to add to the book. These added a very personal touch that she appreciated so much!


The messages were inserted as they were written, not printed from the computer. My kids were pretty young then, as you can tell by their handwriting! My Dad insisted his writing was too horrid and had me type his up to print. He wrote her a poem instead of just a note... it was so so sweet!!!!!!!


Mom and I share a faith in God that brings us even closer to each other. Mom was the one who led me to Jesus when I was just 3 years old. She is the most gentle and loving woman I have ever met. I'm so blessed she is my Mom.


Well, that's it. I hope you enjoyed seeing one of my all-time favorite paper projects. Mom loves this and still looks at it often.

Have you ever tried your hand at a mini-book? This was SO much fun to make! Maybe you can make one too... please come back & share it with me if you do... I'd LOVE to see how special and unique yours will be!!!!

Blessings and Happy Crafting!!!

February 17, 2014

Altoid Tin Photo Album

I just found these pictures of this 3D paper project that I made for my Dad for Father's Day 12 years ago.


It was an empty Altoid tin that I painted & scruffed up to make it look old & beat up.


Then I just added a bunch of pictures and embellishments to a piece of accordian folded cardstock. He keeps it on his dresser & still looks at it today. 

Sorry that the pics are terrible but my old camera was awful. Oh well, you get the gist.
Thanks for stopping by! 

Purse Card Holder

I found this pic on a CD of older photos. I made this for one of my nieces and I remember she really liked it. I took the picture in a paper scanner since my old camera was terrible. So it looks rumpled and kinda strange but IRL it had a fuller body than you can tell here. 

I found the template online somewhere several years ago, I wish I could remember where so I could link to it, but alas... as time has gone, so has my memory!!! HAHA


Just a cutesie little purse to hold a small money card. I used velcro dots to hold it closed. Simple and adorable. Simple is a thing with me, did you notice? 

Well, thanks for dropping by! Feel free to leave me a message! I'd love to meet new crafty friends. 
Blessings and Happy Crafting! :)


Wedding Announcement

Hey guys, I'm so happy you dropped by for a visit! 

So I found my parents' wedding announcement from their local newspaper in a box of old pics and documents. The actual news article was falling apart but I was able to make out all of the words so I just typed them out in MS Word and printed them on some vellum.

I added the only photo that made it through the years with the least amount of wear & tear, a few simple paper hearts, a decorative plastic heart and eyelets at the corners.


Simple, simple, simple... and one of my very favorite layouts! Not that I don't try to make my layouts beautiful, but if the content has great meaning to me, that trumps style.

I'd love to hear from you, so please feel free to leave me a comment, even if it's just to say hello! I love to meet new friends. :)


Scrapbook layouts... a blast from the past

Hey guys, I was recently going through my pictures of layouts and other paper crafts that I've made throughout the years and thought I'd throw a few up here.

These are from the years when I first got into scrapbooking and had a very small stash of paper and embellishments. Being a homeschool mom, we were on a very tight budget so I had to scrapbook on a string! 


I apologize that the picture quality is pretty bad. Back then I had a really old camera and used a paper scanner for many of them. I often take pictures of my layouts and paper projects as a record, just in case, God forbid, anything should happen to them. These days, I have a pretty nice Nikon and use a light box to get a much nicer result... 


Ok, this is me!
This was taken by my daughter on a regular old morning during our homeschool lessons. Not a great picture but this was a typical look for me at that time in our lives. An AMAZING time for me, and they have a lot of good memories too.

So anyhow, I accepted a challenge to do a layout all about ourselves and worked up the nerve to do it. Somehow it seemed wrong, or prideful, or something, I don't know. But I was able to see a lot more good things about myself than I normally thought of myself in my daily life. 

I think it was good for me to remember these things about myself instead of just looking at my mistakes or forgetting about my "whole self". You may want to give it a try for yourself and see what insights you might find! :)


Our favorite Christmastime book when the kids were little was actually from a poem written by Robert Frost. We still have that wonderfully illustrated book and it comes out every Christmas season. 
This was Josh when he was my little Boo. Can you believe his chubby little cheekers?


So here's Baby Girl... a LONG time ago... 16 to be exact! I used to sing 'My Favorite Things' with the kids when they were little and this was a record of her favorite things at age 3! She loves this page now and so do I... it's not anything extravagant or fancy but I love it for what it is. 


This is the Favorite Things record for Baby Boy at age 21 months. In this picture, he was doing his favorite thing at the time... hiding in boxes and jumping out to surprise us! hahaha It was precious and I cannot look at this picture without smiling!


I found this simple layout in a gallery somewhere on Twopeasinabucket.com and decided to make one for each of my kiddos and hubby. I love the simplicity of them because it showcases their faces and the love I feel for them... sappy, huh? They are awesome people and I can't help being sappy about them!

This one is Baby Girl when she was about 6. She was holding her favorite stuffed animal, Snow the puppy. She had that thing forever and the strangest thing is that the furbaby we just rescued looks EXACTLY like her!!!! God is cool that way ;)


Josh's smile here says it all... no need to go on...


This is Vinny back in his mustache years. I can't say that I miss them but he's still my hottie either way. But with his clean shaven face, I don't get tickled when I kiss him now! And I have to say, I like kissing that man ;)


Sarah was only 2 years old here but for some reason she looked older in these pics. Anyhow, I wanted to capture the closeness we have always had between us so this simple layout did just that. The hearts are everywhere because she is such a sweetheart! :)


This was Josh's first time shoveling the sidewalk and he was SO proud of himself! He was only 10 so he was not yet aware of how much he would come to HATE this job over the years! HAHA 

For the embossed snowflakes, I actually had to use a stencil and embossing tool. It's so much easier to emboss with the Big Shot but I did quite a bit of it the old fashioned way throughout the 11 albums I've made so far.


Well, that's it for now... I hope you enjoyed my old memories along with me.
Be blessed and happy scrapping!!!


February 15, 2014

Valentine's Day Spinner Card: Kinetic Card

Hi friends!!! I've been MIA for a while but I've been sick and haven't been real active with crafting lately. But I'm glad to be back and so happy you decided to drop by. :)

I know this is kind of late to post, but I just finished it this morning!!! Nothing like waiting til the last minute, huh? Well, it's not quite as bad as it sounds. Hubby and I decided to celebrate Valentine's Day today instead. We want to go out to dinner tonight and figured maybe the crowds would be a little less insane tonight... we shall see!

Here's the card I made for my love. I tried to keep it as masculine as possible, but still incorporate a heart and a little pink and red. I used my Cricut (what else?!?) to cut the heart and border on the cover of the card. I used MS Word to print out the inside message.

It has 3 pages, the front, 1 inside page, and the back where the message goes. I added that center page to keep the black heart behind the spinner heart so that the inside message didn't show through, since I tried that and it just didn't look right.

I had to go with another spinner card, since I've recently fallen in love with this style. So stinkin cute. I made another spinner card that I posted here, in case you want to take a peek.


I decided to remove the picture of the message page since it may have been a bit too saucy for some. Needless to say, hubby found it very amusing!!!

Here's the tutorial where I found instructions to make a spinner card. Thanks again, Vee!!! She is an awesome crafter, btw. I highly recommend checking out her video tutorials, as well as her blog.

I hope you enjoyed seeing my card ! I'd love to see your spinner/kinetic cards too! :)

February 5, 2014

Flower Spinner Card: Kinetic Card

Hello friends! I have been taking advantage of the cold, snowy Upstate NY weather lately to spend more time in my beloved craft room. Snow away, I say!!!

How are you faring this winter? Hope you are finding ways to keep warm! A nice, hot cup of coffee, my snuggly cheetah slippers and cozy little craft room keep me warm & comfy.

Ok, onto some craftiness!!! I recently came across an awesome blogger, Veronica Chambers. She has a blog here: InkAllusions.blogspot.com and a YouTube account here: TheCoutureCrafter. She has a ton of really great video tutorials on YouTube for paper crafts.

I love how she really takes her time to explain things in layman's terms so even newbies like me can follow her! It's a bonus that all of the things she makes are gorgeous! Thanks for the great ideas, Veronica! :)

This video tutorial inspired me to make a couple of "spinner" cards of my own. Here's one I made for someone's birthday... not sure who yet, but I hope they will find it as pretty and whimsical as I do!

I wish I had taken a picture of the one I made for my niece, Jenna, for her 10th birthday. I really love how it turned out and she was excited to receive it... she spent quite a while playing with it... rewinding and opening it, each time with a huge smile and giggle!!! Man, do I love that munchkin!


Materials:

I used Versa Mark ink with a large floral stamp (no idea what brand), with holographic embossing powder to cover the entire card base. Added a 3-layer flower and 2 frame cutouts in blue and green cardstock- all cut with my beloved Cricut.

I used Stickles to outline the blue cutout by cutting 2 of them, one slightly smaller than the blue one, and used that as a sort of stencil, so that I could paint on the Stickles, if that makes any sense. I also painted Stickles onto the tiny white flower in the center of the flower on the front of the card. Can you tell I have a thing for Stickles? ;)

The "spinner" is made out of a silk flower sandwiched between 2 paper flowers that I cut out with my Cricut (of course!!!), shaped to make them look 3D, then 2 small paper flowers by Target's Got Flowers?, followed up with an eyelet in the middle. Watch Veronica's tutorial to see how she put it all together. She made it really simple! So fun and I think it's pretty adorable. :)

Have you made any kinetic/movement cards? Spinner cards? I'm interested in learning to make lots more unique and/or quirky cut cards. Feel free to show yours off here! Also, if you know of some more great tutorials, I'd love to hear about them.

Thanks for dropping by! I'd love to hear from you so leave me a comment if you'd like...

Blessings to you :)

January 29, 2014

My Greeting Cards

So, I didn't have much time to craft recently, but I cannot stay out of my craft room altogether! So here are a couple of cards I just HAD to make in my spare time...

I am LOVING my new Cricut 'Sophisticated' cartridge! It has a ton of beautiful, elegant designs. I'm finding this whole cardmaking hobby to be addicting, very addicting! Have any of you gotten this amazing cartridge? I'd LOVE to see what fantastic creations you come up with using it! My Cricut ROCKS! :)

I made this card for my Uncle Bob's birthday

materials/supplies used:  Cricut 'Sophisticated' cartridge, Cricut Cuttlebug 'Happy Birthday' embossing folder, ribbon, buttons, thread, twine, patterned paper and a white eyelet.


I made this chandelier card to say thank you to my Mom for buying me another AWESOME new Cricut cartridge! 

materials/supplies: Cricut 'Sophisticated' cartridge, Stickles, small stick-on pearls, stick-on jewels, and a tiny bit of copper embossing on the flames of the candles.

Not too crazy about the way the stickles look as the crystal "drops" but the rest I really like. Many chandeliers are beautiful, don't you think? :)


January 18, 2014

Graduation Craziness!!!!

Our youngest graduated high school last year, with HONORS, no less!!! Proud mama here! It's kind of sad to see her grow up but I am so happy she is doing so well.


We threw her a simple graduation party at a beautiful nearby park. It overlooks the lake and there was a TON of room for the volleyball and horseshoes we set up. The day turned out perfectly, thank you, God! It was sunny and warm but there was a lovely breeze that kept most of the flies away from the food and the bees away from our guests.


I made all of the decorations and most of the food. I planned and prepared all of the games and basically wore myself the heck out!!! But my daughter had a blast, everyone who came said they had a great time and the food was a hit, so it was worth it!!!


Anyone who knows me knows I DON'T DO SIMPLE. I never have, and never will... so I had to do it up right! Money is tight these days, so I had to figure out ways to cut corners. But I don't think it affected the end result too much.


Yes, I'm taking a moment to pat myself on the back... after all, if I don't do it, who will??? LOL It was a TON of work but I am proud of myself for the way everything turned out. I wish I had taken these pics with all of the foods and such at the time of the party but I was so insanely busy I never thought to take any. Oh well, such is life. So I'll just show you what I can now...

Hot Dog Bar


We had a hot dog bar, per my daughter's request. You have to imagine all of those little labels each behind a small bowl of that condiment. It took up a whole HUGE table! It was a LOT of work to make all the signs and labels, and then to set it all up, along with the other dishes and dessert. 


My Mom, Mom-In-Law and myself made lots of yummy side dishes & desserts. Hubby and my Dad cooked up the dogs and some burgers too. I was SO thankful for everyone's help!!!
I didn't really get to socialize at all at the party *insert sad face* but it was for Baby Girl so I didn't mind.

Cupcake Stand

For the first time EVER, I made my own frosting!!! And it even turned out great! I piped them on some homemade cupcakes.

I also made the cupcake stand. Found the idea on Pinterest (of course!). I cut some cardboard circles from a big box, some pattern paper, ribbon and 3 small glass candlesticks from the Dollar Tree to connect them together and WAA-LAA! a super cheap alternative to the really expensive cupcake stands I kept eyeing. Super easy and I think it's adorable. As you can see, there are frosting smudges on it, a tell tale sign that there was actually some yumminess there at one time!


The Money Box


I made this money box out of a regular cardboard box and just decorated it with a few embellishments and empty gift boxes I wrapped up in pattern paper. 


I used my Cricut to make the numbers and picture of the adorable little owl.


Table Decorations

These were on each table (8 OF THEM!). Again, I just used my Cricut and some empty glass jars, sucker sticks, ribbon around the top and some glass marbles inside to help keep everything in place. I love how they turned out! :)

Luminaries


Each of these luminaries are actually a single die cut from the Cricut 'Happy Graduation' cartridge. I backed the sides with tissue paper on one and turquoise cardstock on the other. These were also on the tables.


Graduation Party Invitation


Again, Cricut to the rescue! Her school colors were red black and white so I stuck to that for the cards and money box. But then I did all of the decorations her favorite color, turquoise. For the card, I used my Sizzix Big Shot to make the criss cross embossing and the Cricut 'Happy Graduation' cartridge for all of the images. Pretty simple really, but I made 60 of them so you can imagine how long that took!
Whew! Glad it's over!!! LOL

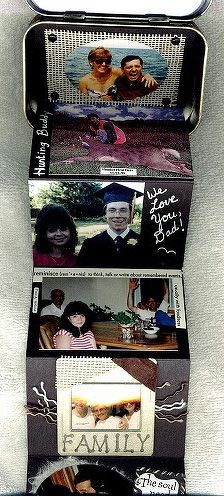
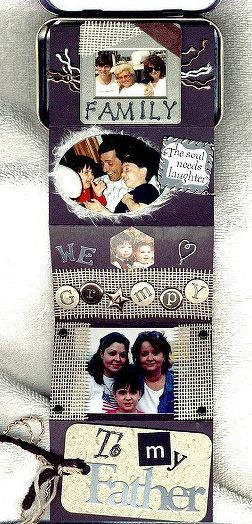
I also made a graduation photo board but I already put the pictures back in their albums so no pic. I wish there was, it turned out really beautiful and Sarah (she will always be Baby Girl to me) loved it. There were some tears by some of her aunts and grandmas as so many memories came to mind. 

So that about sums it up... there were a few other miscellaneous things I made for the party, but I think you get the gist. And I think you can see my obsession with my favorite toy. MY CRICUT makes me smile. :)

Thanks for dropping by. I hope you will leave me a message and let me know what you think or just to say hello. I love to meet new friends. :)